Authentic Pastel de nata Recipe
 Lisbon District, Portugal
JUMP TO RECIPE
We strongly advise you to read the cooking tips before jumping to the recipe though
Introduction & history
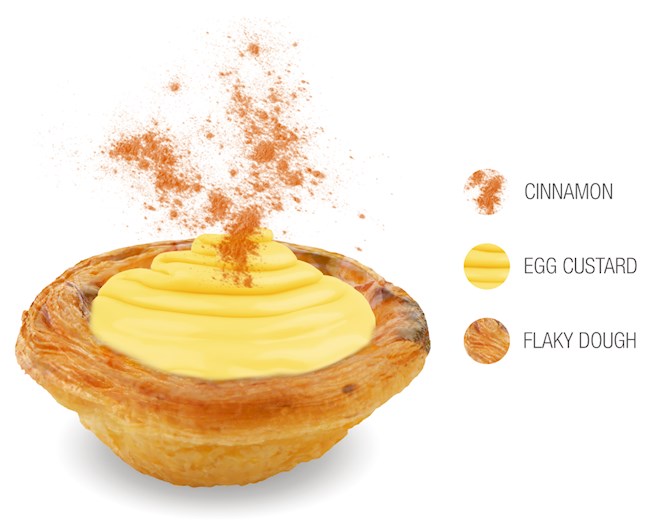
Flaky, laminated pastry shells filled with a creamy egg yolk custard, flavored with cinnamon, or pastel de nata for short, is the world-famous Portuguese dessert invented by Catholic nuns and monks sometime before the 18th century. The preparation is a lengthy one, and every step should be done with the utmost care. First, the pastry is made by laminating the dough with butter — however, lard was used before, and margarine is commonly used today. The custard is made with just milk, water, sugar, and egg yolks, and flavored with cinnamon, or in some recipes also with vanilla and lemon, which has the purpose of cutting the sweetness of the custard. However, in any case, the custard should not be overly sweet. Once the pastry shells have been filled with custard, they are baked in a high-temperature oven for a short time, which gives for a blistering burn on the top that makes these custard tarts instantly recognizable. Pastel de nata should be eaten shortly after baking, so ... Read more


Pair with


Cooking tips
-
puff pastry
The dough made with just flour, salt, and water, should be loose. It is laminated with butter, typically, although some swear the flakiness of the puff pastry is due to the use of lard and not butter. Margarine, with high fat percentage, is often used because margarine, unlike butter, will not burn, plus it is less prone to melting and breaking, resulting in a puffier pastry. If making from scratch,... Read more -
portuguese tart molds
Traditionally, pastéis de nata are baked in special Portuguese tart molds that can be purchased online or in specialized Portuguese shops. Alternatively, muffin tins can be used, but make sure not to use the ones with a non-stick coating as high temperatures may melt it. Because pastéis de nata need to bake quickly, for at-home preparation in ovens that cannot reach high temperatures, it is advised ... Read more -
shaping the tarts
Place each slice of puff pastry into an individual mold, then with wet fingers, press on the puff pastry to push it into the tin, and work your way up the sides — the result being a pastry shell with sides that are thicker than the bottom. Some chefs advise putting the pastry shells in the freezer for at least half an hour, so when you pour in the custard, it doesn't soak into the pastry. -
custard
The custard typically consists of three components; the flavored sugar syrup, the thickened flour and milk mixture, and egg yolks. The sugar syrup is usually flavored with cinnamon, sometimes vanilla, and often lemon rind, which is supposed to cut to the sweetness of the custard. The sugar syrup and the milk and flour mixture are most commonly combined first, and then, once cooled a bit, the egg yolks ... Read more -
baking
The factories producing pastéis de nata bake them shortly in 750-800°F (400-430°C) ovens, whereas for at-home preparation temperatures typically called for are ranging from 500-575°F (260-300°C). However, even those temperatures will be difficult to reach by most home ovens, so it's best to bake these tarts at about 475-485°F (245-250°C) for about 20-25 minutes. Actually, some claim it is better to ... Read more
Recipe variations
-
Pastel de Nata
Ready in 14h 15minThis traditional pastel de nata recipe gives detailed instructions on the preparation. Because puff pastry needs to stay in the refrigerator for a minimum of a few hours, but ideally overnight, it is best to make the pastry the day before. Also, the amounts listed for custard are enough for 12 tarts, so you can store the other log of puff pastry in the freezer and use within two weeks or double the amount of custard and bake 24 pastel de nata instead of 12.
Pastel de Nata
PREP 1h 15min
COOK 20min
refrigeration 12h
RESTING 40min
READY IN 14h 15min

This traditional pastel de nata recipe gives detailed instructions on the preparation. Because puff pastry needs to stay in the refrigerator for a minimum of a few hours, but ideally overnight, it is best to make the pastry the day before. Also, the amounts listed for custard are enough for 12 tarts, so you can store the other log of puff pastry in the freezer and use within two weeks or double the amount of custard and bake 24 pastel de nata instead of 12.
Ingredients
FOR THE PASTRY
290g (10.2 oz) flour
1/4 tsp salt
210 ml (3/4 cup + 2 tbsp) water
240g (8.5 oz) very soft unsalted butter
extra flour, for dusting
FOR THE CUSTARD
40g (1.3 oz) flour
60 ml (1/4 cup) milk
165 ml (2/3 cup + 1 tsp) water
240g (8.5 oz) superfine sugar
1 cinnamon stick
another 250 ml (1 cup + 2 tsp) milk
1/2 tsp vanilla, optional
6 egg yolks
TO FINISH
powdered sugar and cinnamon, for sprinkling
Preparation
Add the flour, the salt, and the water to a mixing bowl of a stand-alone mixer fitted with a dough hook. Mix for a few minutes until you get a sticky dough that pulls away from the sides of the bowl.
Let the dough rest for 10-15 minutes and generously sprinkle your working surface with flour.
Use a dough scraper to transfer the dough from the bowl onto a floured working surface.
Push the edges using a dough scraper to give it as much of a rectangular shape as possible — this may be difficult as the dough is very sticky and loose.
Generously sprinkle the top of the dough with flour, then wrap the dough, with the flour included in cling film. Rest the dough for 10 minutes.
Heavily flour a large working surface and place the dough in the center. Roll out, using a dusted rolling pin, into a 16x16-inch (40.5x40.5 cm) square.
Gently brush off the excess flour from the surface of the dough using a soft brush.
Cover 2/3 of the dough with 1/3 of the butter — evenly arrange it in small dabs first, then spread it gently using an offset spatula, leaving a 1-inch (2.5 cm) outer border unbuttered.
Before you can fold the dough, you will need to unstick it from the working surface. To do that, help yourself with a dough scraper and lots of flour that you should drive under the dough as you push it with the scraper.
Fold one-third of the dough over the middle part of the dough, then fold the other outer third of the dough over the center of the dough as well.
Now, unstick this folded strip of dough, sprinkle some more flour on the work surface, and turn the dough 90 degrees, so its longer part is facing you. Roll out into a 16x16-inch (40.5x40.5 cm) square.
Brush the flour from its surface and repeat the buttering step.
Roll out to an 18x21-inch (45.5x53.5 cm) rectangle, taking care that the shorter side is facing you.
Trim the edges with a dough scraper to get a neater finish. Brush away the flour and spread the last third of butter over the entire surface of the dough.
Roll into a cylinder, with the help of a dough scraper to unstick the dough, while brushing away the flour with a soft brush. Take care to roll it very tightly, especially in the beginning.
Trim away the edges, then cut the roll in half, so each half makes for 12 1-1.5-inch (2.5-3.75 cm) pieces.
Wrap each roll separately in cling film, and refrigerate for at least a couple of hours, but preferably, overnight.
Mix 60 ml (1/4 cup) of milk and 50g (1.75 oz) of flour in a bowl, then set it aside. To a heavy-bottomed saucepan, add water, sugar, and a cinnamon stick.
Heat over low heat until the temperature reaches 100°C (210°F) — keep a digital thermometer at hand to check the temperature, and do not stir, but allow the syrup to dissolve on its own.
Meanwhile, in another pan, boil the milk, and pour it over the milk and flour mixture, while constantly stirring. If desired, you can mix in 1/2 a teaspoon of vanilla.
Once the syrup reaches 100°C (210°F) temperature, take out the cinnamon stick with a pair of thongs, then pour it into the milk and flour mixture, while constantly whisking.
Once the syrup is incorporated, whisk for another 10-15 minutes so the mixture can cool down enough to add the egg yolks — it should be still warm but not hot — then, whisk in the yolks.
Sieve the custard into a jug, so it's easier to measure out when pouring it into pastry shells. Cover the jug with cling film and set it aside for later.
Cut the log from the refrigerator into 12 equal pieces, about 1-1.5 inches (2.5-3.75 cm) each.
Place each piece in 12-hole, regular-sized cupcake pan that you've greased lightly. Leave it to sit for 10-15 minutes so the butter can melt a bit.
Moisten your thumbs with cold water, then press on the center of the pastry to push it down and stretch it a bit.
Then, once the bottom of the hole is covered, draw the dough up its sides, taking care that you do not overstretch it, or the custard might spill out.
Pour custard into each pastry shell, so it's 3/4 full.
Bake in a 280-290°C (540-550°F) oven for eight to nine minutes.
Eat warm, sprinkled with powdered sugar and cinnamon.
Cooking tips
-
adaptations
If your oven can't reach these temperatures, bake the pastries for longer. When baking at a lower temperature, it's possible that the pastries will not have blackened spots, which you will need to create using a blowtorch.
Other authentic recipes

Rating And Comments
Rate It
Wanna try?
Add To List